 All posts
Junk Drawer Organization: Audit First, Then Decide
Learn how to organize a junk drawer in 10 minutes. Discover the 6-month rule, container selection tips, and how to document small valuables for home inventory.
Corey Everett built Arclyst from a background in Library and Information Science, with the goal of bringing structured information management into everyday home life.
Gemini-assisted drafts are reviewed by Corey Everett before publication.
Publisher: EverCreate Studio
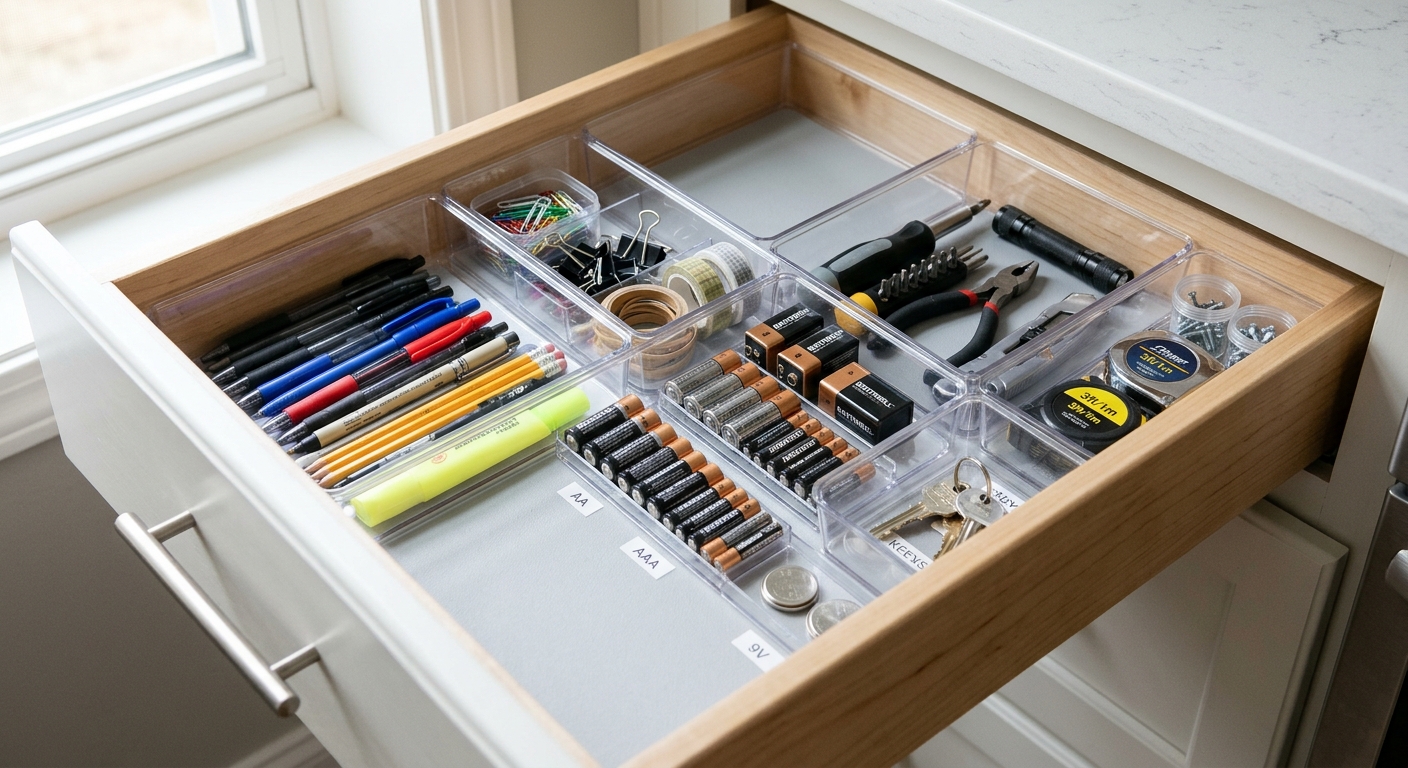
Junk drawer organization works best as a sequence of decisions, not a shopping trip. To effectively reset this space, you must first dump the drawer entirely, photograph everything, tally what you actually own by category, purge the excess, and only then pick trays, dividers, or bins based on your specific contents. Completing this audit takes about 10 minutes, and it clearly separates everyday utility items from the small valuables that belong in your searchable home inventory.
Key takeaways
- Purge before sorting: Use the 6-month dead-item test. If you have not used, missed, or remembered an item in six months, it leaves the drawer.
- Photograph your piles: After dumping and grouping, take photos of your categories. These images help establish a visual record of existence for small valuables.
- Apply the frequency rule: An item earns a drawer spot only if you use it weekly and losing it costs little. Valuable or sentimental items need a fixed, secure home.
- Match containers to your tally: Use compartment trays for many small loose items, adjustable dividers for odd shapes, and small open bins for bulky categories.
- Maintain with simple rules: Keep the drawer from reverting with a one-in-one-out rule and a 5-minute monthly reset that includes documenting new valuables.
What should you throw out before organizing a junk drawer?
Purge before you sort. The fastest filter for a cluttered space is the 6-month dead-item test: if you have not used an item, missed it, or remembered it existed in six months, it goes in the toss or donate box. Sentiment is not a criterion here. A dead screwdriver with a stripped tip and a dead battery both fail the exact same test.
The 6-month dead-item test
Empty the drawer entirely onto a towel or clear counter. Pick up each item individually and ask one question: Has this earned its spot since [season six months ago]? If the honest answer is no, it leaves the drawer.
Items you hesitate on go into a "maybe" box with today's date written clearly on the outside. Store this box out of sight. Anything still unopened when six months pass gets donated or discarded without being opened again.
Categories that are almost always safe to toss
Certain items universally clog utility drawers without providing value. These include dead batteries, expired coupons, dried-up super glue, pens that no longer write, keys to locks you no longer own, takeout sauce packets, and paper instruction manuals for appliances (which you can easily find online).
General guidance on decluttering often recommends asking whether an item is used, needed, or loved before it earns premium storage space. Everything worth keeping moves to the next step: a quick, objective audit of what is actually left.
Note that anything with a serial number, an active warranty, or a real replacement cost—like a spare tile tracker, a multi-tool, or expensive earbuds—is a candidate for a home inventory record later rather than the trash.
How do you audit what is actually in your drawer in 10 minutes?
Dump, group, and photograph
Empty the drawer onto a counter or towel so every single item is visible at once. Sort what comes out into rough, logical piles: tools, batteries, cords, pens, takeout menus, keys, and hardware. Then, photograph each pile with your smartphone before anything goes back into the drawer.
Those photos do double duty. First, they show you exactly what you own so you can plan a logical layout. Second, they help establish a baseline visual record for the small items that are notoriously difficult to remember after a fire or theft. A drawer full of expensive chargers, spare key fobs, and gift cards is exactly the kind of thing most people never write into a spreadsheet, but snapping a photo takes five seconds. If you want to apply this same photo-first approach to the rest of your space, a comprehensive kitchen inventory checklist can walk you through the process room by room.
Tally by category to drive your layout decisions
Count each pile and write the number down. Ten pens and two batteries mean you need a pen cup or long channel, not a massive battery organizer. The tally tells you whether compartments, dividers, or small bins best fit your drawer's reality. It also flags duplicates—if you have fourteen tape measures, you can purge the excess before anything gets a permanent spot.
How do you decide what actually belongs in a junk drawer?
Frequency and failure-cost rules
An item earns a drawer spot if you use it weekly and losing it costs you little. Think of pens, scissors, tape, spare AA batteries, or a small flashlight. If you use an item monthly but rarely weekly, it belongs in a labeled bin elsewhere, such as a utility closet or garage.
If losing the item would hurt financially or emotionally, it does not belong in a high-traffic junk drawer at all. That last rule catches the expensive, critical items people stash in the kitchen by default simply because they don't know where else to put them.
Where valuable and sentimental items should live instead
Spare car keys, loaded gift cards, passports, fine jewelry, and irreplaceable old photos should move to a fixed home you can name in one sentence, like a fireproof lockbox or a specific primary bedroom closet shelf.
Small valuables are also among the hardest items to prove ownership of after a disaster. Carrier guidance consistently stresses keeping receipts, photos, and serial numbers for possessions you would claim. A searchable insurance claim guide will note that while photos establish existence, they must be paired with concrete documentation. Using a system like Arclyst helps you catalog belongings from photos into searchable records, though you must remember to separately capture receipts, warranties, and hidden serial numbers to satisfy an adjuster.
How do you choose between compartment trays, dividers, and small bins?
Match the container to the category mix from your audit tally, not to what looks tidy on a store shelf or social media feed.
Decision criteria by item shape and size
| Audit Result | Best Container | Why It Works |
|---|---|---|
| Many small, loose items (batteries, twist ties, spare keys) | Compartment tray | Fixed cells stop small things from migrating when the drawer opens. |
| A few medium items with odd shapes (tape, scissors, chargers) | Adjustable dividers | You can set the cell size precisely to the object's footprint. |
| Bulky or overflow items (instruction packets, small tools) | Small open bins | Bins lift out easily, so you can carry the entire category to another room. |
A drawer that is mostly small hardware wants a rigid tray. A drawer that is a mixed bag of office supplies and tools wants adjustable dividers. If you found more than three or four bulky categories during your tally, modular bins beat both.
Measuring before you buy
Measure the drawer's inside width, depth, and height at the narrowest point. Subtract nothing from these measurements—write down the exact numbers. Buy trays or dividers that fit those dimensions, and double-check that the assembled height clears the drawer frame above it.
Photograph the empty drawer with a tape measure in the frame so the measurements live in your digital records. That photo slots straight into a searchable home inventory later, allowing you to reference the dimensions without re-measuring if you ever need to replace the cabinet or buy new organizers.
What is the best layout for a kitchen junk drawer versus a desk or entryway?
Zone assignments should follow what each drawer actually holds, rather than forcing a one-size-fits-all tray into every room.
Kitchen junk drawer zones
Kitchens accumulate tools and consumables, so run three distinct zones:
- Front zone: Daily-grab items (scissors, twist ties, spare house keys, pens).
- Middle zone: Fasteners and repair bits (command strips, rubber bands, super glue).
- Back zone: Rarely touched overflow (instruction pamphlets, specialty tools).
Keep anything sharp or liquid in a closed bin or dedicated slot so it cannot migrate and cause injury. Batteries belong in their own non-conductive compartment, kept loose from metal items like paperclips or screws to prevent accidental discharge.
Desk and entryway drawer zones
Desks and entryways hold small, high-value items instead: chargers, postage stamps, spare car keys, and sunglasses.
Put the most frequently pocketed item nearest the opening. A drawer you often open one-handed while rushing out the door needs its everyday zone at the very front. While some organization systems recommend QR or smart labels for these drawers, keeping it simple is often better. If items move frequently, scanning systems can become tedious to maintain.
Whichever drawer you are laying out, photograph each zone once it is set. A visual record is easier to maintain than a typed list, which is why a home inventory photo system built room by room generally outlasts rows of typed spreadsheet fields.
When does a junk drawer deserve to be split into two drawers?
Signals it is time to split
Three overflow signals indicate a drawer has reached critical mass:
- You cannot close the drawer without jiggling it to flatten the contents.
- You regularly have to dig past more than one layer of items to find what you need.
- One specific category (like batteries, tools, or chargers) has grown larger than everything else combined.
A fourth signal is subtler: if items from two entirely different rooms share the drawer, your retrieval time doubles because you are effectively searching two locations in one.
How to divide the categories
Split by room first, category second. Keep the drawer nearest the kitchen strictly for kitchen-adjacent items: twist ties, spare keys to the back door, tape, and scissors.
Give the second drawer—ideally located in a desk, hallway, or entryway—everything that belongs to another room. This includes command hooks, picture hangers, small hand tools, and spare batteries for devices that live in the living room. One drawer becomes "kitchen utility," the other becomes "household supplies," and every item has exactly one logical home.
Should you document what you keep in your junk drawer for home inventory?
Yes, but only selectively. A junk drawer holds a mix of trash, everyday cheap supplies, and a few items that carry real replacement value after a fire, flood, or burglary.
The items in your drawer with claim value
Spare car key fobs, unredeemed gift cards, small electronics (like backup earbuds), expensive multi-tools, and hardware with serial numbers can all matter on an insurance claim. A gift card is spendable money; a lost key fob for a modern vehicle is a significant replacement cost. Renters frequently forget these small items, but renters insurance covers contents the same way a homeowners policy does.
Photo records versus spreadsheets for small items
The reason most home inventory attempts die is that they demand exhaustive typing. A drawer full of loose batteries, zip ties, and a few high-value items is exactly where typing feels pointless.
Photos solve the problem differently. Open the drawer, take one wide shot to capture the context, then pull out the three or four things with actual claim value and photograph each alone: the gift card face, the key fob, the earbuds alongside their case. Dedicated tools built for this, whether you are looking for a Sortly alternative or using Arclyst, help turn those shots into a searchable catalog. The habit that survives is the one that takes ninety seconds, not the one that takes an entire evening.
Limitations of photo-only documentation
It is critical to understand that photos prove an item existed, not necessarily what you paid for it or its exact specifications. Gift cards lose their balance context in a simple photo, and a blurry shot of a key fob may not satisfy an adjuster on its own.
To ensure your documentation is robust, you must separately capture serials and warranties. Photograph the back of the gift card (with the PIN covered if necessary), capture the serial number printed inside the earbud case, and keep digital copies of your receipts. Photograph the drawer anyway—a partial visual record is always better than an empty spreadsheet—but know that photos alone do not guarantee an insurance payout.
How do you keep a junk drawer from reverting to chaos?
A drawer stays organized because it has rules, not because it was cleaned once. Two simple habits cover it: a strict rule for what gets added, and a short, scheduled reset that catches drift before it spreads.
The one-in-one-out rule
Every new item that enters the drawer must displace one. New batteries replace dead batteries; a new permanent marker replaces a dried-out one. If nothing in the drawer deserves removal, the new item likely does not belong there either. This single rule prevents the slow, invisible accumulation that turns a sorted drawer back into a chaotic pile.
A 5-minute monthly reset
Once a month, empty the drawer onto the counter and put back only what fits its designated zones. Anything left over gets a permanent home elsewhere or goes in the trash.
While you are there, photograph anything new worth documenting in your home inventory. This ensures your searchable record stays current without requiring a massive, separate data-entry session. Five minutes, once a month, is all it takes to maintain the system indefinitely.
FAQ
What is the fastest way to organize a junk drawer? Empty it entirely onto a towel, purge anything you have not used in six months, group what remains into logical piles, and photograph each pile. The whole sequence takes about 10 minutes. The photos help establish a visual record for small valuables, and the pile counts tell you whether a tray, dividers, or bins best fit your contents.
What items should always come out of a junk drawer? Dead batteries, expired coupons, dried-up glue, dead pens, keys to locks you no longer own, takeout sauce packets, and paper manuals you can find online. Items with serial numbers or real replacement costs should be moved to a secure location and added to a home inventory record.
What belongs in a junk drawer and what does not? An item earns a spot if you use it weekly and losing it costs little: pens, scissors, tape, spare batteries, and a flashlight. Monthly-use items go in a labeled bin elsewhere. Spare keys, gift cards, passports, and jewelry should move to a fixed, secure home like a lockbox.
Should I document junk drawer items for insurance? Only document the few items with actual claim value: gift cards, key fobs, small electronics, and expensive tools. Take one wide shot of the drawer, then photograph each valuable item closely, ensuring you also capture receipts and serial numbers separately. Tools like Arclyst can help organize these photos into a searchable catalog.
Related guides
Want a frictionless way to catalog what you own? Try Arclyst — free for 55 items. Snap a photo, AI fills in the details.