 All posts
The home inventory photo system: wide shot, close-up, receipt
Learn the three-photo system for home inventory photos. Discover how to capture wide shots, close-ups, and receipts for faster insurance claims.
Corey Everett built Arclyst from a background in Library and Information Science, with the goal of bringing structured information management into everyday home life.
Gemini-assisted drafts are reviewed by Corey Everett before publication.
Publisher: EverCreate Studio
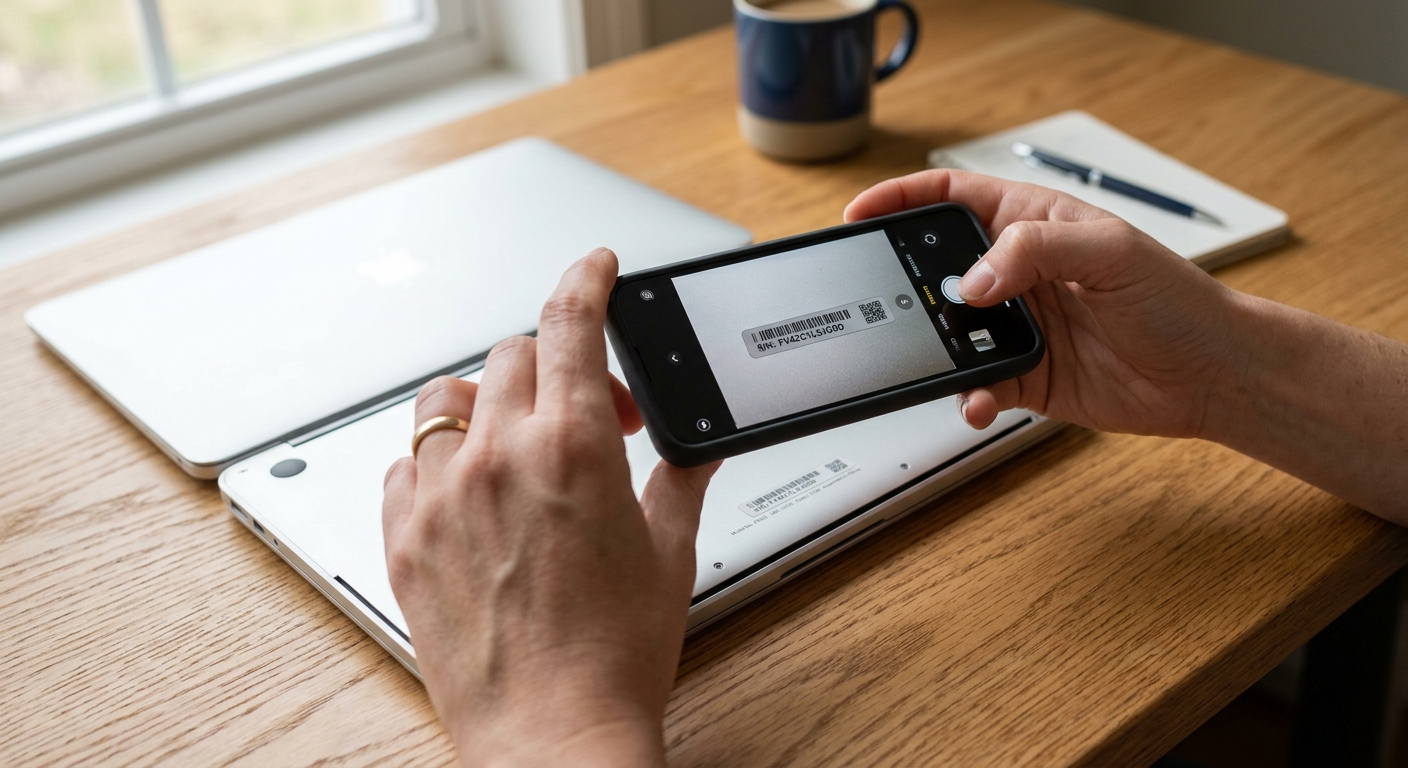
A home inventory photo system links room views, item close-ups and supporting documents to records of your belongings.
Snapping a quick picture of your living room isn't enough to guarantee an insurance payout after a fire, storm, or theft. Adjusters need visual proof of belongings that establishes exactly what you owned, its condition, and its value. The most reliable way to document your assets is the three-photo system: a wide shot, a close-up, and a proof shot.
TL;DR
- Insurance adjusters require proof of existence, make/model, and ownership to approve replacement cost claims.
- The wide shot proves the item was in your home and establishes context.
- The close-up captures the brand, model, and physical condition of the item.
- The proof shot documents the serial number, purchase receipt, or warranty.
- Documenting items with this specific framework prevents adjusters from heavily depreciating your belongings.
- Using a dedicated system prevents crucial home inventory photos from getting lost in your camera roll.
Why a single photo isn't enough for insurance claims
When you file a claim, the burden of proof is on you. If you claim a $1,200 espresso machine was destroyed in a kitchen fire, the insurance company will not simply take your word for it. They need documentation.
A single photo rarely tells the whole story. A wide shot of your kitchen proves you had an espresso machine, but it doesn't prove it was a high-end Breville rather than a $40 generic brand. A close-up of the machine proves the brand, but without a receipt or serial number, the adjuster might depreciate the value heavily, assuming it is an older or refurbished model.
Insurance policies typically pay out based on either Actual Cash Value (ACV) or Replacement Cost Value (RCV). ACV factors in depreciation, meaning an older TV will yield a smaller payout. RCV pays what it costs to buy a brand-new equivalent today. To get an accurate RCV payout, you must prove exactly what model you lost.
The three-photo system eliminates ambiguity. It provides a complete, undeniable record of your belongings, speeding up the claims process and ensuring you receive the correct replacement value. For a deeper look at how adjusters evaluate these records, review our insurance claim guide.
Preparing for your photo inventory session
Before you start taking photos, a small amount of preparation will make the process faster and the resulting images much more useful for an insurance adjuster.
- Gather your paperwork first: Find your physical receipts, warranty cards, and professional appraisals before you start photographing a room. Keep them in a stack so you can quickly place them next to the corresponding items.
- Optimize the lighting: Turn on all the lights in the room and open the blinds. Serial numbers are notoriously small and printed on reflective metallic stickers. Good lighting is required to get a readable shot.
- Pull items away from walls: You will need access to the back of televisions, the bottom of laptops, and the rear panels of kitchen appliances to find manufacturer data plates.
- Clean the surfaces: Wipe dust off electronics and appliances. A thick layer of dust in a close-up photo can suggest to an adjuster that the item was neglected or not in working order prior to the claim.
What are the three photos in this inventory system?
Take a wide shot for context, a close-up for item details, and a proof shot of a receipt or other supporting record.
Documenting your home doesn't have to take weeks. By applying this specific framework to your most valuable items, you create an ironclad record.
1. The wide shot (Context and existence)
The wide shot is a contextual photograph. It shows the item in its natural environment within your home.
This photo serves a very specific purpose: it proves the item was actually in your possession and located at the insured address. If you only provide a close-up of a television screen, an adjuster could argue the photo was taken in a store or a friend's house. A wide shot showing the TV mounted above your specific fireplace removes that doubt.
How to take it: Stand back and capture the item along with the surrounding furniture, windows, or architectural features. Ensure the lighting is bright enough to clearly identify the object in relation to the room.
2. The close-up (Make, model, and condition)
The close-up focuses entirely on the item itself. The goal here is to establish the exact make, model, and current condition of the belonging.
If your home is burglarized, the police and your insurance provider will need identifying details to process the report. A close-up should clearly show brand logos, distinct features, and the general wear and tear on the item. This helps establish that the item was in good working order prior to the loss.
How to take it: Move in close enough that the item fills the frame. Ensure the brand name or logo is clearly legible. If the item has custom modifications or specific damage (like a scratch on a desk), take an extra close-up of those details to establish a baseline condition.
3. The proof shot (Serial number, receipt, or appraisal)
The proof shot is the most critical photo for high-value items. It establishes exact valuation and undeniable proof of ownership.
This photo should capture the manufacturer's label, the serial number sticker, a physical receipt, or a certificate of authenticity. Serial numbers are especially important; they allow adjusters to look up the exact specifications and current market price of the item, ensuring you get an accurate replacement cost.
How to take it: Locate the manufacturer sticker (often on the back or bottom of electronics and appliances). Use your phone's macro lens or tap to focus carefully so the small text is readable. If you have the paper receipt, place it next to the item and photograph them together.
Examples: How to photograph common household items
Applying the three-photo system varies slightly depending on what you are documenting. Here is how to handle the most common high-value categories on your home inventory checklist.
| Item Category | 1. Wide Shot | 2. Close-up | 3. Proof Shot |
|---|---|---|---|
| Laptop / Computer | Sitting on the desk in your home office. | The keyboard and screen, showing the brand logo. | The sticker on the bottom showing the serial number and model specs. |
| Television | Mounted on the wall in the living room. | The front bezel showing the brand (e.g., Sony, LG). | The manufacturer sticker on the back panel, or the digital "About" screen showing the serial number. |
| Bicycle | Parked in your garage or living room. | The frame showing the brand and gear components. | The serial number stamped under the bottom bracket (the part the pedals attach to), plus the purchase receipt. |
| Kitchen Appliance | The refrigerator or oven in the context of your kitchen cabinets. | The front control panel and brand badge. | The data plate located inside the door frame showing the model and serial number. |
| Fine Jewelry | The jewelry box sitting on your bedroom dresser. | The piece itself, clearly showing stones and metal color. | The professional appraisal document or the jeweler's receipt. |
| Power Tools | The tool resting on your garage workbench. | The side of the tool showing the brand and voltage. | The printed label showing the model number and date code. |
Documenting difficult items without serial numbers
Not everything in your home has a convenient barcode or data plate. Antiques, custom furniture, original artwork, and inherited collections require a slightly different approach to the proof shot.
For these items, the wide shot and close-up remain the same. The proof shot, however, must focus on unique identifiers.
For antique furniture, photograph the joinery (like dovetail joints in drawers), the maker's mark stamped on the back, or the specific wood grain. For artwork, take a macro shot of the artist's signature and the brushstrokes. For inherited jewelry without a receipt, the proof shot should be a photograph of a recent professional appraisal document.
If you have absolutely no documentation for a high-value antique or collectible, hire an appraiser. An insurance company will not pay out $5,000 for a vintage rug based solely on a photograph; they require a certified valuation.
Organizing your home inventory photos
Taking the photos is only half the job. If you leave 300 inventory photos mixed in with your vacation pictures and screenshots, you do not have a home inventory—you have a digital mess.
When a disaster strikes, you will not have the time or emotional energy to scroll through years of camera roll history looking for a picture of a router's serial number. You need a dedicated system.
Arclyst is built specifically for this workflow. Instead of manually typing out details, you can use the Arclyst app to snap your wide, close-up, and proof shots. The AI automatically identifies the item, extracts the text from the receipt or serial number, and categorizes it by room. You can try the interactive demo to see how it extracts data from a single photo.
For Android users, the mobile workflow is even faster. You can walk through your house, taking the three photos for each major item, and let the app build your database in real-time. The free tier allows up to 55 items and 15 AI scans per day, which is enough to document the most critical assets in an average apartment or small home.
Common mistakes when taking photo inventory for insurance
Even with the right system, small errors can make your documentation less effective. Avoid these common pitfalls:
- Blurry serial numbers: Always check the photo before moving on. If the serial number is blurry and the physical item is destroyed, that data is gone forever.
- Ignoring the inside of storage: Don't just photograph the outside of a closet or a closed toolbox. Open drawers, cabinets, and boxes to show the density and quality of the items inside.
- Forgetting the garage and shed: People often document their living rooms perfectly but forget the thousands of dollars in tools, lawn equipment, and seasonal gear stored outside.
- Failing to capture digital receipts: If you bought an item online, you won't have a paper receipt to photograph. Print the emailed invoice or take a screenshot on your phone, and upload it alongside the physical photos of the item.
- Failing to update: A home inventory is a living document. When you buy a new $2,000 sofa, you must take the three photos and add them to your records immediately.
FAQ
How many photos do I need for a home inventory?
For high-value items (electronics, appliances, furniture, jewelry, art), use the three-photo system: wide, close-up, and proof. For lower-value bulk items like clothing, books, or kitchen utensils, a few wide shots of your open closets, bookshelves, and drawers are usually sufficient.
Do insurance companies accept digital photos?
Yes. Digital photos are the standard for modern insurance claims. However, they must be clear and unedited. Ideally, back them up to the cloud or a dedicated inventory app. This keeps a copy available if your phone is destroyed in the same event that damages your home.
What if I don't have receipts for my belongings?
If you lack receipts, the close-up and proof shots become even more important. A clear photo of a serial number allows the adjuster to verify the exact model and its market value. For older items, wide shots establish that you owned the item, even if you can't prove exactly what you paid for it.
What if the serial number is worn off or unreadable?
If the physical sticker is damaged, look for digital alternatives. Many smart TVs, laptops, and gaming consoles list their serial number in the system settings menu. Take a clear photo of that screen. If the item is not electronic, rely on the closest identifying marks, such as a model number cast into the metal or a specific manufacturer badge.
How often should I update my home inventory photos?
You should update your inventory immediately after making a major purchase, such as buying a new appliance or a piece of fine jewelry. Additionally, it is smart to do a quick walk-through once a year—often around tax season or after the holidays—to capture any new items and remove items you have sold or donated.
Should I take a video instead of photos?
A video walkthrough is a great starting point and provides excellent wide-shot context for your entire home. However, video rarely captures serial numbers, model names, or receipt text clearly. The best approach is to take a single continuous video of your home, and then use the three-photo system for individual valuable items.
Turn your photos into a usable inventory
A camera roll full of receipts and serial numbers is hard to manage when you actually need it. Arclyst helps you turn those photos into a structured, organized database.
Simply take your photos, and let Arclyst's AI identify the items, read the serial numbers, and organize everything by room. If you ever need to file a claim, you can export a clean, professional PDF Claim Pack directly to your adjuster. Start documenting your home for free at arclyst.org.
Related guides
Want a frictionless way to catalog what you own? Try Arclyst — free for 55 items. Snap a photo, AI fills in the details.